TimberSurf’s Model Railway
Modelling Tips, Links & Guides for Model Railways
Lumsdonia Railway

A web page for my indulgence and sharing ideas and irregular updates on my Model railway


SALE
PLUS
A guide to the adding LED lamps to your buffers!
Adding LED’s to buffers Guide
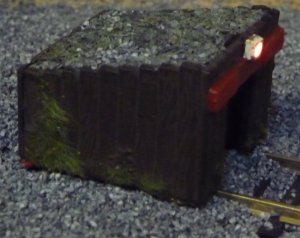
Buffer Lamps
Base Buffers
There is a wide selection of buffers you can fit a lamp too, these are a few possible's:-
Peco SL-41 00/H0 Buffer Stop Sleeper Built Type
Peco ST-270 00/H0 Buffer Stop, Sleeper Built Type
Peco SL-340 Buffer Stop Rail Built Type
Hornby R083
Hornby R394
Parkside Dundas metal
Lanarkshire Models
Matchstick scratch build
An anatomy
Buffer lights are a simple addition to add some interest to your layout. Modern LED lighting makes it cheap and easy to accomplish. There are a few suppliers that make very detailed examples like DCC Concepts, but if like me you have 40 buffers, that would work out expensive! Making your own is much cheaper, and almost no extra work!
Instructions
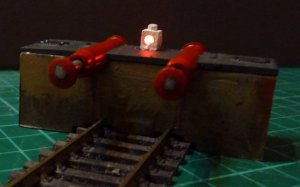
Paint the buffer first and buffer beam. Solder small lengths of wire to each side of the LED. Paint your chosen colour (white). Attach to buffer (first drill holes in sleeper version) with UHU/Bostik glue.
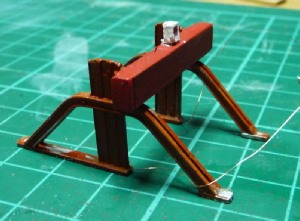
For rail version
Attach the wire to inside surfaces with superglue, touch up paint to cover the wire.
Fit to track and solder the resistor to one one wire and the supply to the opposite end and the other wire (test first to ensure correct polarity). Glue the resistor and both wires to the underside, so that no strain is applied to the fine wires.
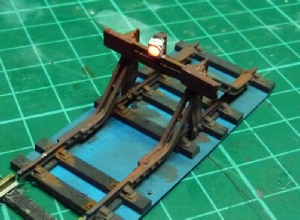
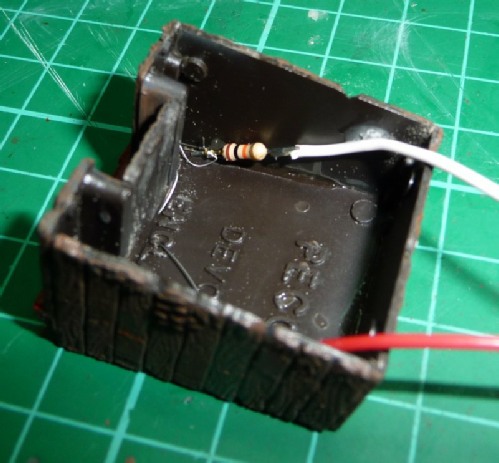
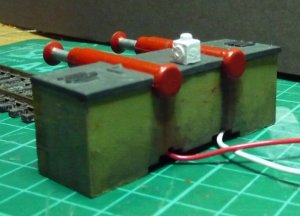
For sleeper version
As above, except all the wiring can be soldered and glued inside, which makes it easier than working under the layout.
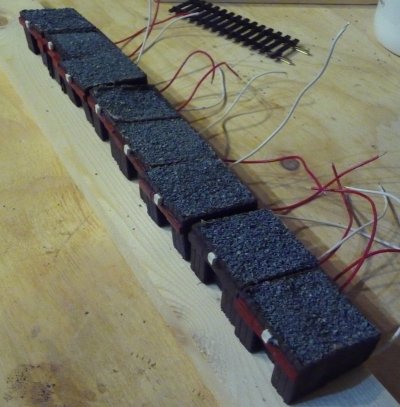
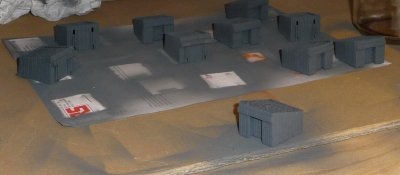
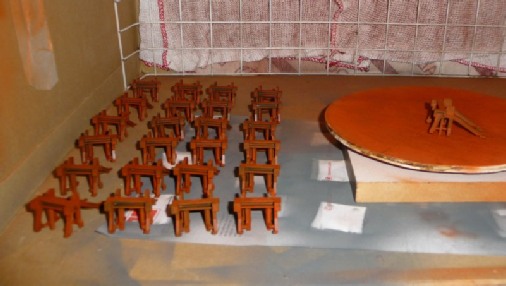
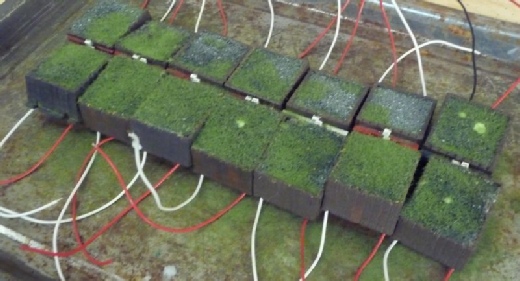
As my final layout design will need about 40 buffers and I have been collecting stock for many years, I went into overdrive and did mine as a production batch!
I added a little static grass to the sleeper type for that unkept look (shown before excess removed)
Materials
I have seen some have used 3mm or 5mm red LED's, but that looks terrible! Either use a 1.8mm or SMD LED, both look reasonably correct and to scale. (I used SMD, but the excess plastic on the 1.8mm can be filed off to make more square)
You will need some enamelled wire, no less than 0.2mm or ultra fine insulated wire (7/0.05)
Resistors dependant on leds and supply voltage
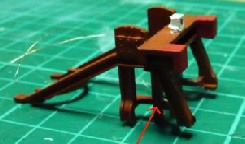
Standard Hornby
Front web cut back
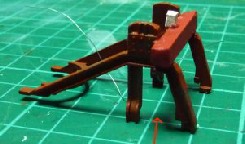
With leg
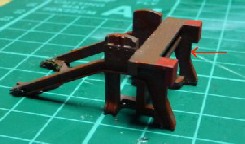
Leg & buffer blocks removed

Even the humble Hornby can be cut back and made more prototypical
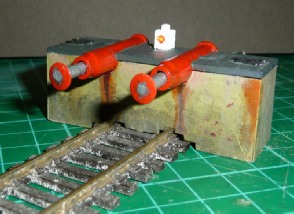
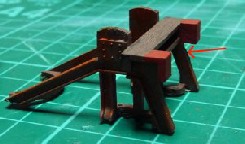
Hornby hydraulic
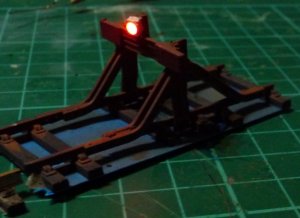
The red plastic lamp can be drilled out and the SMD LED glued in flush as shown. The wires and resister can be lost in the base like the sleeper version.
Lanarkshire Models