TimberSurf’s Model Railway
Modelling Tips, Links & Guides for Model Railways
Lumsdonia Railway

A web page for my indulgence and sharing ideas and irregular updates on my Model railway


SALE
PLUS
Lights
The use of bulbs is probably pointless as they get hot and take far more current than LED's. Older stock/era should have yellowish LED's to imitate incandescent bulbs and more modern stock/era should have whiter daylight LED's to imitate fluorescent tubes. (See Tip601)
Electronics
Putting an electronic circuit between pickups and lights is type dependant if DC or DCC is used, although a few designs could be used on both. The are two types that give slightly different effects and then there is an independent battery.
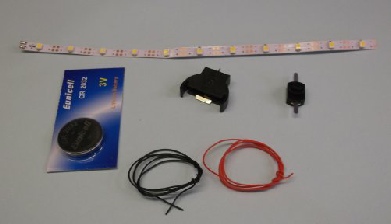
Battery Power
Supplying 12VDC for 12V bulbs in a carriage may work on O gauge, but for OO, it would be difficult to find space for 8 AAA batteries! These days a tiny watch battery will give many hours of use on LED's. The problem is how to switch it on and off.
The simplest idea is to use a switch (mounted under the undercarriage), but that is fiddly to get to. I would recommend either a motion sensor or
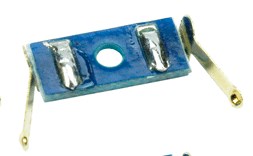
latching reed switch. (video here)
A CR2032 will probably give 10's of hours off use, if switched off between sessions.
The advantage of a battery system is that there is no pick ups or fancy electronics to fit and can be used on both DC and DCC layouts, or both.
The disadvantage is that each coach needs to be split open (unless the battery box is hidden in the undercarriage) each time the battery runs out and the ongoing cost of replacement batteries.
A guide to the many options to light your coach's and guards van’s
Carriage Lighting Guide
Coach Lighting
Pickups
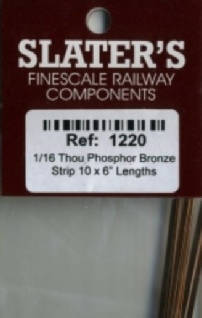
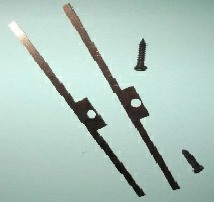
If we ignore brass pins, there are two options to collect power. Phosphor bronze strip or sheet can be cut up or bought as ready made. This is then attached to the bogie by glue or screws and rested against either the side of the wheels or else the axle. It is a given that the two wheels are metal and insulated from each other. If both wheels are insulated from the axle, then one has to be electrically connected by silver foil/brass shim or with conductive paint.
An anatomy
I guess the first OO lighting was brought out by Hornby, in the form of two spring loaded brass pins, between the wheels, for pick ups and a few incandescent bulbs wired up in the carriage. As they varied the voltage to drive the train with DC, the lights where only full brightness when the train was at full tilt and dimmed as the speed reduced and went off when stationary and when passing over bad/dirty track or points. Somewhat disappointing!
These days there are quite a few options with electronics and most now use LED's
DCC
The object of this is to collect power from the track (permanently on) and regulate it for the lights, but additional electronics can be fitted to eliminate 'dips' in supply over dirty track and points. The AC type waveform of DCC needs rectifying (and possibly reducing the voltage if much above 12V). The use of a Schottky type is recommended, as normal diodes/bridge diodes are not fast enough to recover on the high frequency of DCC, although they work, they can potentially cause problems with the waveform and give feed back to the controller. If the DCC voltage is much above 12V, then a voltage regulator after the diodes is recommended to protect the LED's. The addition of a large capacitor across the LED supply will help reduce 'dips'. (known as an anti-flicker circuit)
DC
The object of this is to collect power from the track (intermittent/reduced) and regulate it for the lights, but additional electronics can be fitted to overcome voltage reduction, dirty track and points and track voltage off. A rechargeable battery with charging circuit would potentially be ideal, but as yet is not available commercially, so a capacitor based system is the main option. The reversing voltage of DC needs rectifying (and possibly reducing the voltage if much above 12V). This can then be fed in parallel with a capacitor to the LED's.

DC and DCC pickup on/off control
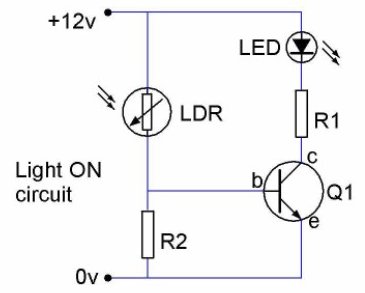
If fitted as above, the lights will always be on (once first charged for DC) which may suit some, but for realistic daylight running, a means to switch the lights off may be required. For DCC, a decoder can be fitted to the coach and just used to remotely switch the lights on and off. This is an expensive option if fitted to each coach. Some have fitted wires and connectors between coaches in a fixed rake so one decoder can control the whole rake. A far better solution for either DCC or DC is to fit a Light Dependent resistor (LDR) and transistor to switch the lights on, only when the layout is dark. ESU do a combined lighting strip with built in decoder!
Guards Van
As a van only has one LED (tail light), the endurance of a capacitor is greatly increased.
Lumsdonia
As I run DCC, I am developing an anti flicker with LDR, to fit to my 50 coaches, when I have perfected the components and have some fitted and working, I will publish here
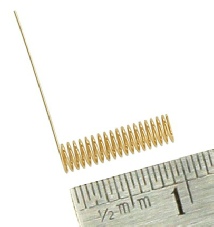
The second option is to use a spring over the axle (an idea I had 15 years ago using Biro pen springs) now readily available from DCC Concepts or simply a short piece of copper tube.
NCE do a “Light-It Decoder”
Pack of 3 decoders - $19.95 [£15 in UK]
Built in effects and dimming and can have stay alive fitted.