TimberSurf’s Model Railway
Modelling Tips, Links & Guides for Model Railways
Lumsdonia Railway

A web page for my indulgence and sharing ideas and irregular updates on my Model railway


SALE
PLUS
A guide to make a spring loaded, easy maintenance base for your lamps!
Delicate lamp protection ‘How to’
Bung Lamp Base
An anatomy
You buy those beautiful delicate scale lights, you spend for ever stringing them all in parallel with resistors under the layout, you stand back and admire the great job, while scrutinizing the the new pools of light, you notice some other new anomaly and dive in to fix it. What was that, that just tickled your elbow???
B%^&*cks .
You have just destroyed all your hard work, by sideswiping a new lamp that wasn't there an hour ago!!!
If they are anywhere near scale, they are incredibly delicate and just begging to get a bashing!
I have often pondered using 3.5mm jack plugs (or even better for scale, 2.5mm). Quick disconnect for maintenance on the layout (if you remember to take them out) but the jack socket will have to be glued in, making the lamp rigid and the danger of bending the lamp post or jack plug is still a risk.
So I came up with an alternative, for ease of maintenance and inbuilt rigidity, anti-vibration and bend resistance!
Basically mount the post on a spring!
Not very pleasing to the eye or prototypical, so a little lateral thinking lead to rubber.
This then jumped to a fixing system that is tapered, so fits snuggly, can rotate when required to set correct attitude and is readily removable. I will solder a connector to each lamp so that once pulled up, I can detach without going under the board, this is possible, because the hole for the bung is around >6mm in diameter!
The top of the bung can be’lost’ in the ground cover, and can be easily removed and reinserted with a little pressure for seamless integration
The use of a wide hole to mount the lamp means that a push in connector can be used on the end of the wires, allowing very easy maintenance/repair as there are no tools involved for removal (under the board)
A taper hole (cone) cutter or a step cutter can be used, just keep trying till the bung fits tightly with the top flush with the board
Another ingenious side effect, is that your base board thickness makes no difference! This works on any depth (beyond 3/4in, just drill a 6mm hole through the rest)
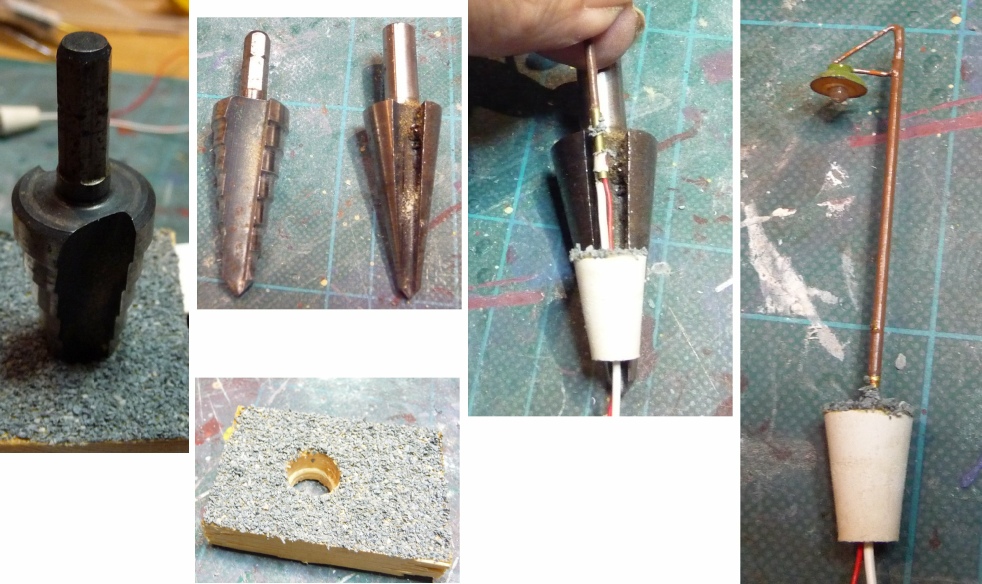
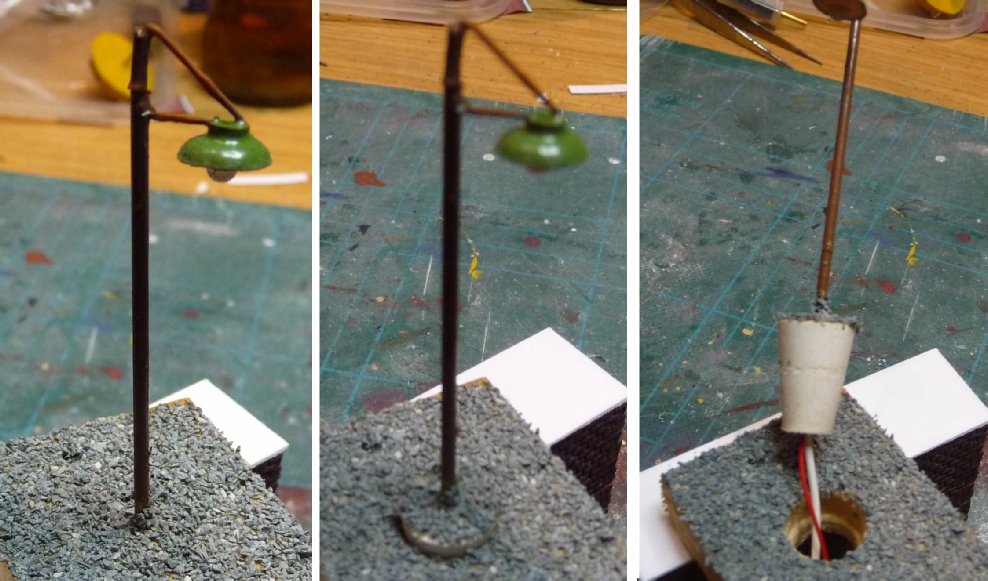

Assembled lamp just pushes into a pre-drilled hole a little smaller than post, leave the rubber test tube bung in the freezer to make it easier to drill and ensure drill is "square" as you drill the hole
Supply list
Bungs Size: 00# :15 x 11x20mm
Small cone or step cutter
Drill bit < lamp post
Freezer